01
GPU-first pipeline
Automatic mode prefers NVIDIA TensorRT for faster depth inference and falls back to bundled NVIDIA CUDA. Full-resolution stereo processing remains on the GPU.
Turn a Windows display or application into live side-by-side stereoscopic video. Depth estimation and stereo rendering stay on your NVIDIA GPU.
Windows 10/11 · 64-bit · NVIDIA CUDA required
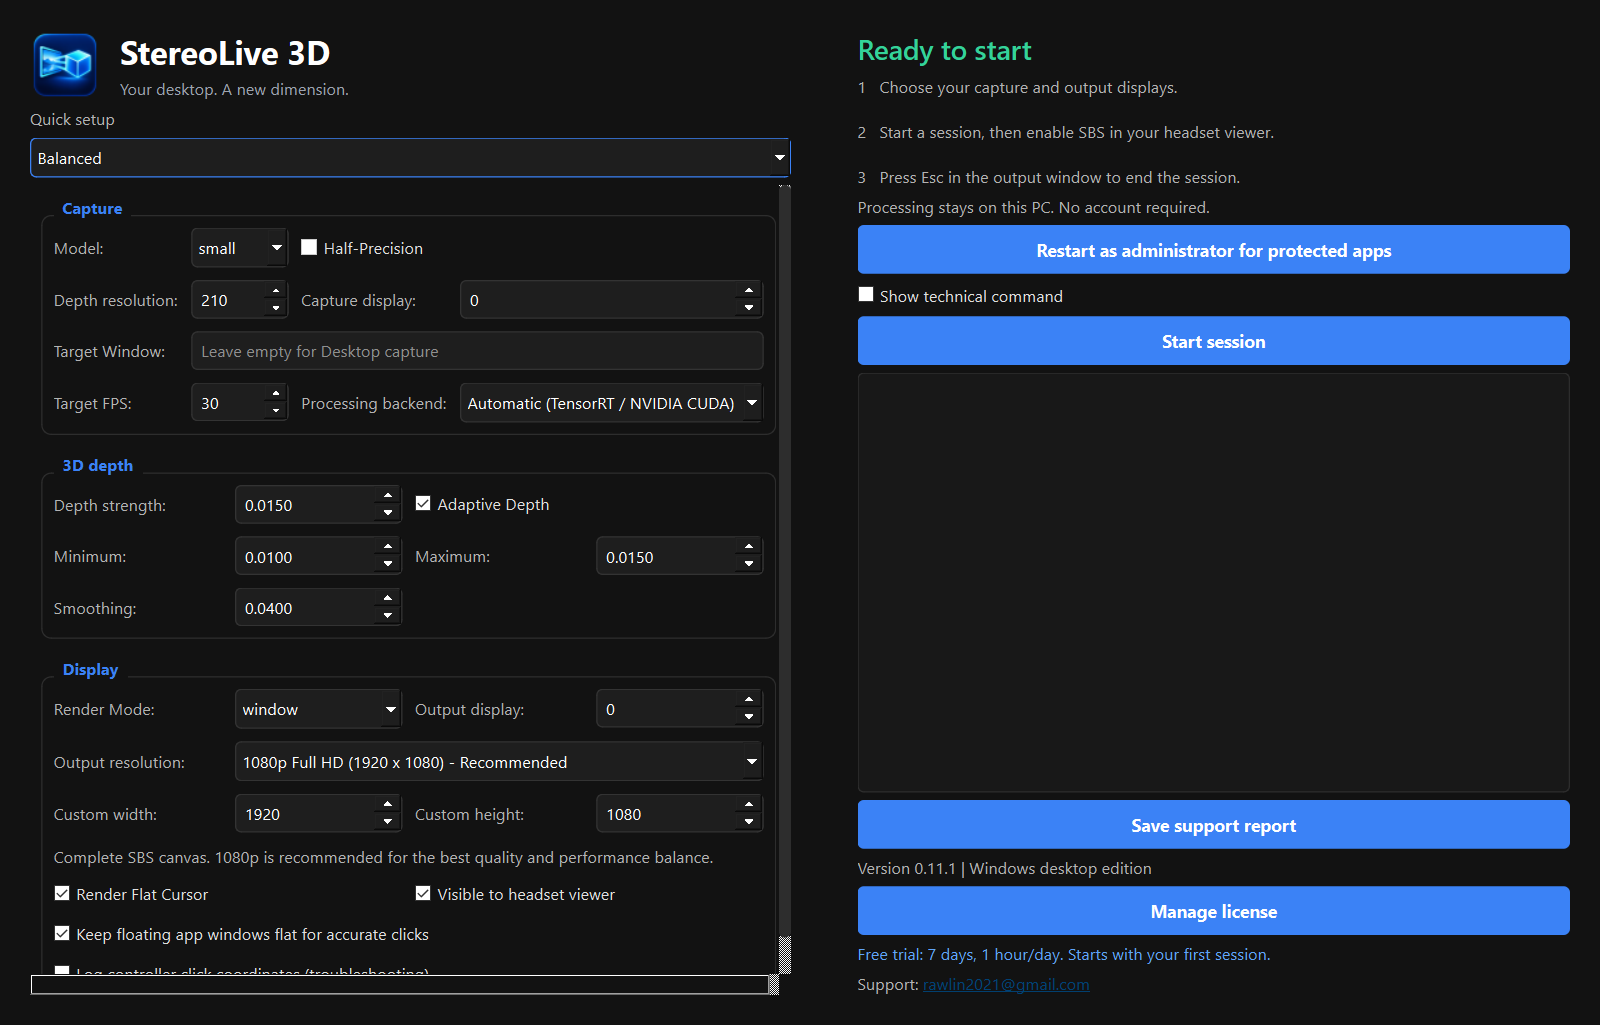
Capture your screen, estimate scene depth, and render an SBS view in real time from one focused desktop application.
Automatic mode prefers NVIDIA TensorRT for faster depth inference and falls back to bundled NVIDIA CUDA. Full-resolution stereo processing remains on the GPU.
Adjust strength, minimum, maximum, and smoothing to fit the content and your viewing comfort.
Open a local fullscreen SBS window. Version 0.11.2 includes LiveKit browser streaming with selectable audio and adaptive bitrate.
Frames are processed on your PC. The desktop beta has no account system, telemetry service, or automatic support uploads.
Try it for seven days, up to one rendering hour per UTC day. A perpetual offline key removes trial limits.
Select the display or app window you want to capture and your output display.
Start with Balanced, then set the depth strength and smoothing for the scene.
Start the session and enable side-by-side viewing in your compatible headset viewer.
Use the local SBS window through Virtual Desktop, or use LiveKit browser mode over your trusted local network.
Choose window as the Render Mode and keep Visible to headset viewer enabled. Open your PC desktop in Virtual Desktop, select the StereoLive 3D output, then enable Virtual Desktop's side-by-side viewing mode.
Controller support is intentionally limited. Button mapping can vary with the headset, Virtual Desktop, and the controller mode exposed to Windows.
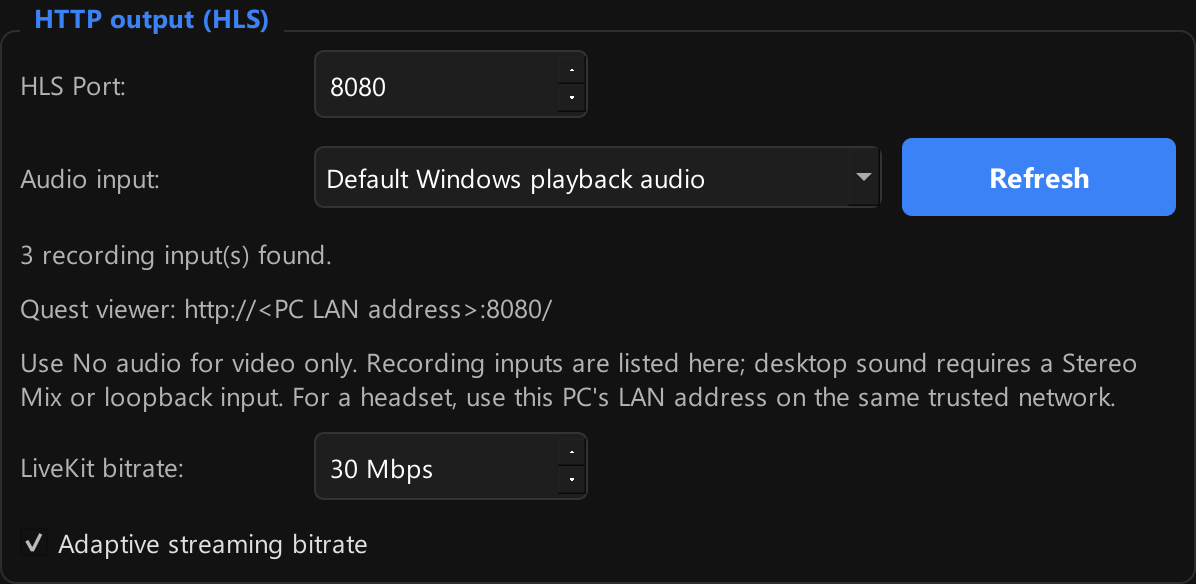
In version 0.11.2, choose livekit as the Render Mode and leave port 8080. Select default Windows playback audio, a specific playback or recording device, or No audio (video only). The bundled media server starts automatically; Python and a separate LiveKit installation are not required.
Connect the PC and Quest to the same trusted local network.
Open the displayed address, such as http://PC-address:8080/.
Press Connect with audio, use the video's fullscreen control, then select SBS/3D in your headset browser.
Start with a 30 Mbps maximum and Adaptive streaming bitrate enabled. Bitrate decreases after repeated packet loss and recovers gradually. If audio capture fails, video continues without audio. Browser streaming is a beta; occasional pauses and audio synchronization still need testing, and remote desktop controller input is not supported. Legacy web HTTP/HLS remains available and requires FFmpeg. Use a Private Windows network; Setup adds firewall access limited to the local subnet.
The media server, encoder and browser player are included in the installer. No LiveKit account or separate streaming app is needed.
Prepare your network. Connect your PC and Quest to the same trusted local network. Use Ethernet for the PC where possible. Set your trusted Windows network profile to Private so the installer's local-subnet firewall rules apply.
Choose your capture. Open StereoLive 3D, apply Balanced, select the screen or application to capture, and set Render Mode to livekit. Leave the viewer port at 8080.
Select audio. Click Refresh. Choose Default Windows playback audio to capture your normal PC sound, or a Playback: device matching the Windows output your video uses. Recording: inputs capture a microphone or recording source instead. Choose No audio (video only) for silent viewing. An unavailable device or capture error leaves video running without audio.
Set streaming quality. Start with LiveKit bitrate: 30 Mbps and Adaptive streaming bitrate checked. This value is the maximum; adaptation lowers the target after repeated packet loss and recovers gradually. A higher maximum may improve compression quality but does not guarantee higher FPS or smoother playback. Apply changes before starting a new session.
Start and connect. Start the session, then open the actual LiveKit viewer address from the session log in Quest Browser, for example http://192.168.1.20:8080/. Press Connect with audio on the page. The same button connects video-only sessions too.
Enable 3D manually. Show the controls along the bottom of the video and press the fullscreen icon. In Quest Browser's fullscreen video controls, choose the side-by-side (SBS/3D) viewing option when available. Fullscreen alone does not turn an SBS image into headset 3D. Enter stereo VR is an alternative on a supported secure WebXR origin; it may be disabled on a normal HTTP address.
Finish the session. Use Disconnect in the browser and Stop in StereoLive 3D. Stopping the installed session also stops its bundled media server.
Page will not open: use the PC's LAN address, not localhost. Check that the session is running, both devices are on the same network and guest-network isolation is disabled. Check Windows firewall access for StereoLive 3D on your trusted Private network.
No sound: verify that your PC is playing sound through the selected playback device. Stop the session, refresh the device list and select the correct output, then reconnect. Use video-only mode to isolate audio issues.
Two flat images: choose SBS/3D after entering native video fullscreen. Headset browser controls and available viewing modes can vary.
Pauses or audio out of sync: keep adaptive bitrate enabled, try a lower bitrate maximum and close competing GPU or network workloads. Browser playback and audio synchronization remain beta features. Window mode with Virtual Desktop remains an alternative.
Higher depth and resolution are not always better. Begin with the defaults, confirm stable performance, and increase one setting at a time.
Virtual Desktop and Meta Quest are third-party products and are not included with or affiliated with StereoLive 3D. Their interfaces and supported viewing modes can change.
This NVIDIA edition has a focused hardware target. Check your PC before downloading the 2.58 GiB installer set.
Check & download →Version 0.11.2 is an unsigned beta. These limits matter before installing or purchasing.
NVIDIA only. AMD, Intel-only, ARM, and systems without CUDA are not supported.
64-bit only. The current Qt, CUDA, and machine-learning stack does not support a 32-bit build.
Unsigned beta. Windows may show a SmartScreen warning. Clean-PC and wider hardware validation are still pending.
Browser streaming is beta. LiveKit includes its PC streaming components; you need a compatible headset browser with SBS viewing. Short pauses or audio synchronization issues can occur. Remote desktop controller input is not supported in LiveKit.
Legacy web needs FFmpeg. HTTP/HLS requires an NVENC-enabled FFmpeg installation. LiveKit does not need separate FFmpeg. Use a trusted local network.
Performance varies. Resolution, GPU, content motion, capture target, and other workloads affect frame rate.
Seven days. Up to one rendering hour each UTC day.